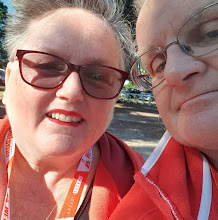
Welcome back everyone, did you miss me? LOL
I've had a very busy couple of weeks during which I attended the OnStage Live International Stampin' Up Event in Auckland, New Zealand. And what an event it was! I've spent today unpacking and going through all the deliveries that came whilst I was away. YES, my Product Purchase Premiere order arrived this morning too!

I've come home with loads of freebies, new ideas, samples, tons of inspiration, great memories, and many many gorgeous swaps from like minded Independent Stampin'Up! Demonstrators from around the globe. Our Kiwi neighbours put out the biggest welcoming mat and great weather too! To say being there in person was awesome aye is an understatement. The opening Moari welcome was really heart warming to see. I hope you get to see some of it via youtube because oh my goodness, you could just feel it in your heart, it was so beautiful! I think I actually may have captured some of it, we shall see if it's any good and I promise I will share it with you.
[gallery ids="1184,1183,1182,1181" type="slideshow"]
So many people received one of my swaps so I thought I would quickly share with you how I made it and what I used. Believe it or not you nearly had to pick me up off the floor when I saw what was inside our welcome bags before the first session. I couldn't believe it! I chose to make a giant daisy paper clip book mark. I used the stamp set Daisy Delight. Oh wait til you see the new stamp set that compliments Daisy Delight, Daisy Lane. Not only have they kept this stamp set and it's matching large Daisy punch, they have a medium daisy in the new Daisy Lane red rubber set along with a medium sized Daisy punch. On sale from 4th June 2019!!
[gallery ids="1186,1187" type="rectangular"]

FYI: the giant paper clips were purchased from Kmart here in Australia for $1.99 for a pack of 10 clips.
I stamped out the large daisy 3 times them & punched them all out. To adhere them together I've found the best thing to use is a hot glue gun. You also hot glue, onto the back, a 1 1/4" punched out circle of what ever card stock you want to use up (scraps are good for this) Next you put a big blob, about half the size of the punched out circle and sit the giant paper clip in it. Note: Be mindful to glue the end that isn't where you slide it onto/into a page! Add some more hot glue over the top of the embedded paper clip and place a 2nd punched out 1 1/4" circle punch over the top and gently press together. Don't press too much or you will squish the hot glue out the sides. That's it, easy peasy lemon squeezy! I have been making these or versions of this type of book mark for many years and it's amazing how many people tell me they are still using them. That makes my heart so happy to know! If you look closely at my last photo you will see the new Daisy Lane stamp set that I used to make this last sample yesterday after I'd unpacked everything.
I have a lot more to share with you so do check back often and see what is coming. Want a new catalogue sent to you when they are available? Drop me a few lines or message me on my Facebook business page with your details. (Note Australia only)
I will be photographing all the gorgeous swaps I received and I'm going to make the photos into a slide show to share with you. As I've over 60 to photograph, it's going to take a little bit of time, so bare with me, they'll be wonderful to see. We have some very very talented demonstrators here at Stampin'Up!
so til next time, remember,
happy stamping, colouring & creating!
Product List


No comments:
Post a Comment
Do leave me some comments, it's nice to you know you've visited!